Articles, Dana Diament, Resources, Uncategorized
Spine: Anatomy, Dysfunction, Treatment
A healthy spine plays a crucial role in our body’s ability to move efficiently as well as protect and house our spinal cord. Dysfunction or injuries to our spine has implications on both our mobility and our nervous system, and therefore even small changes have the potential to make a big impact to alleviating pain these injuries and dysfunctions can cause.
Because of its direct connection to the nervous system, when working with spinal dysfunction, a great place to start is with the breath. This can be especially helpful when you don’t have a diagnosis or you don’t know what to do with a patient. The breath is a powerful tool to feed and nourish our parasympathetic nervous system, the rest and digest system responsible for healing and repairing the body. In Napa, I personally noticed how the extra pranayama that week improved my back and hip pain.
Tensegrity
Before diving into spine dysfunction and treatment, let’s understand the concept of tensegrity. Think of a trampoline. If you were to cut one of the springs, all of the other springs on the trampoline will have to work that much harder. The spine is a similar model whereby the bones do not directly attach to each other but connect via soft tissues. So if there is a muscle or a ligament that is overworked or not firing properly, then this will create tension or pressure into the surrounding and supporting joint structures — muscles, ligaments and also discs.
The power of this concept is this: pain in one area of the spine could originate in a different area. For me this was eye-opening and helped me connect the dots between how my computer work and sitting in a chair causes my thoracic to tighten up, causing my low back to work overtime, resulting in low back and SI joint pain. I noticed too that I felt the best on the day in which the morning practice was focused on the Thoracic spine.
Tensegrity also applies in the transverse plane, from the front to the back of the body. When you look at the cross section of the body – the back of the body takes up about a third to a quarter of space, while three- quarters to two-thirds of the body is in front of the spine. Consider how much weight ( comprising of organs, fat and abdominals) is in front of the body, and how much harder then the back muscles have to work, especially if the frontal abdominals are more dormant. This is one reason a properly functioning Transverse Abdominus is so important for a healthy spine.
Biomechanics
The discs can also “take up the slack” when there is a lack of tensegrity either through poor posture, extra weight in the front of the body pulling the spine forward, or poor biomechanics. Over time the unequal pressure on the discs can lead to herniated or bulged discs.
Even our movements in our yoga practice put different amounts of pressure on the discs. Supine poses have the least amount of pressure on the discs, followed by Standing, then standing with twist or fold, and the most pressure put on the discs is seated poses with twists or fold. We can see that in our Sun Salutations the transitions often become the most troublesome because they require so much flexion, extension, and rotation. Again, the role of TVA becomes very important to help draw the abdominal contents in and protect the spine.
With all of this unequal pressure on the discs, what can we do to keep them healthy? To receive their nutrients they must imbibe through small movements. You can think of it like gently wringing a towel – through a squeeze and soak action as we take the weight off the discs, they can swell with the fluid they so need at their center, the nucleus pulposis. This is why “twists” are good for the spine, but note there is a fine line between a healthy amount of twisting and too much movement – especially for people with back injuries and disc issues. In the acute phase of an injury, lying down for a very gentle twist can be therapeutic. In a more functional yogi, using our arms to get deeper into a twist can defeat the purposes of a twist. Using your arms causes the spine to flex, which puts more pressure on the discs. Maintaining a neutral spine is paramount.
Joint Irritation & Posture
The boney structure of each vertebra also has implications for our movement. The 3 weight-bearing surfaces of the two facet joints along with the vertebral body itself has the capacity to enhance or limit our movement. This is important when we look at where an irritation exists. When the facet joints are irritated, the extension is a harder movement because the facets joints bear more weight. Therefore you would avoid or heavily modify backbends for people with facet joint issues. When there is irritation in the disc, flexion becomes harder and as the vertebral body bears more of the weight, affecting the disc. Therefore you would avoid or modify forward folds depending on the severity of disc irritation.
Actually, it’s what we do all the time that has the potential to be most troublesome — our posture. This makes sense when we consider the model of repetitive motion (those of you that have attended a module before would be familiar with this equation i = NF / AR ). Due to our postural patterns or as we get more and more tired, the force or tension (F) gets higher and higher — this means that simply by looking at our posture we have great potential to reduce injury to our spine and help with back pain. For example, we could check the position of our head a few times a day and lift up through the back of the skull or we could set an alarm to get out of our chair every thirty minutes.
With those concepts in mind, let’s take a closer look at each section of the spine.
Cervical Spine
Here most problems stem from the increased mobility (because of the orientation of the facet joints, the cervical spine has movement in all directions). We’ll want to address the overworked neck muscles from Forward Head Position (FHP), which most of us have to some extent from our digital lifestyle (phones, computers). Injury can also occur as a result of whiplash where the ligaments become strained.
Many of the exercises for the neck our patients can easily do at home by themselves which is very helpful for them to be able to do more often and regularly. At the back of the neck are the rectus captius (anterior, posterior & lateral), important because of their connection to the spinal cord and cerebral spinal fluid. They are also responsible for the “yes/no” movement and are often short from FHP. To lengthen them and make space, you can place tennis balls at the back of the skull, hooking them under the occiput, and press up on the balls with thumbs towards the top of your head, holding for 1 minute.
In the front of the neck, the main stabilizers are the longus colli. Even though they are very tiny muscles they are actually more efficient than the overused and overstressed scalene and sternocleidomastoid (SCM); when “strong” they counteract FHP without creating more tension in the neck. To “strengthen” these muscles, very delicately nod your head in the yes direction just a few degrees 100x a day.
At the side of the neck, the scalenes can be massaged with an upside down hitchhiker’s thumb. With the SCM, you can simply massage whatever is tender. This one is often nice to do lying down, but you can easily check in with these muscles a few times a day and release tension while sitting at your desk.
Thoracic Spine
The main thing to note in the thoracic spine, which tends to be the least commonly injured area of the spine, is the decreased mobility in this area. Due to the orientation of the facet joints and the attachment of the ribs, this part of the spine naturally has less mobility, and so we want to prevent any further loss of mobility.
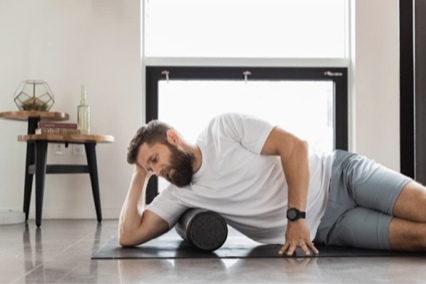
Part of this will be to stretch what’s tight. To do this we could look at myofascial release with tennis balls on the chest muscles, upper back, and lats. We can do restorative postures for the upper back with rolled up mat or blanket or bolster. We can also do some small movement based exercises to extend the thoracic spine using a foam roller or block.
The other part of this is to strengthen what’s weak – and here we’re primarily talking about the small rotatores and multifidus muscles. To strengthen them we need very small twisting movements. You can do these at a chair, modifying your supine twist, or incorporating into plank or tabletop. The key is to keep the lumbar spine and pelvis stable (don’t move it all) to focus the movement only in your chest—it will be a small amount!
Lumbar Spine
The deep stabilizers, multifidus and TVA, are crucial for various low back injuries and dysfunction. The multifidus is often atrophied when low back pain exists, and in people with rounded spines, they are often unable to fire. When you can effectively fire them by swelling them, they actively pull back on the vertebrate and prevent the spine from going into hyperextension. As we saw in the thoracic spine, small rotational movements will strengthen the multifidus, and in cases of herniated discs, the rotational force can help annulus fibrosis to heal so that the multifidus can begin to fire.
One of the most effective exercises and really great for people with herniated discs is to use a stretchy piece of tubing tied around one side of your pelvis and the other to the door, and rotating your pelvis side to side (be sure to switch sides). You can also learn to swell these muscles while supine or prone, and then you can try this in bird dog, half moon, or warrior 3 if the injury is not acute.
The role of TVA and the abdominals is important in helping with the common postural changes we see in the lower body and helping to create a balanced posture. In the case of lordosis, strengthening TVA will help to remove too much extension in the spine. For flat back cases, we’d look at the myofascial release of rectus abdominus, which when overdeveloped can inhibit TVA’s ability to fire. For swayback, in cases when lordosis is not present, TVA is crucial for reintroducing the lumbar curve.
It is also helpful to asses and treat the 3 pillars of the spine: erectors, QL and psoas, These muscles lie close to the joints of the spine and getting them to work together with TVA and multifidus is important. Often the erectors are overworked, there are imbalances in the QL from right to left, and the psoas is both weak and tight. Additionally, you could look at the ability of glut max and hamstring to fire before the erector spinae to support the spine’s extension in poses like Shalabasana.
The Sacrum
Because there are no muscle bellies that cover the SI joint, this can be a vulnerable area. The ligaments play a big role in providing both the stability and the movement needed. The ligaments can overstretch, sprain/tear, become hypo mobile (don’t move enough); and this can happen on one or both sides. Once the ligaments are torn, they are more vulnerable and because they are elastic and avascular, they are slower to heal.
The Trendelenburg test can be very beneficial for investigating what might be happening with the SI joint. Typically, when the side that is more painful moves more, there is hypermobility and strengthening is required. Hypermobile people should stay away from asymmetrical stretching poses, especially long holds and especially in the acute phase of the injury. Also look at any asymmetries in the person’s posture – for e.g. if they sit at their desk with their legs crossed. Strengthening gluteus medius and minimums with the adductors is key along with QL and hamstrings. If the iliopsoas is tight, avoid stretching; instead, roll with tennis balls or stand on a block with one foot and swing the other leg gently above the floor.
If the painful side moves less, there is hypomobility and gentle stretching can be beneficial. The only exception is when the whole pelvis moves, then we need to work on bringing more movement to the joint on the side that moves the whole pelvis and possibility of strengthening the other side.
With SI Joint pain, effects of asymmetrical movements in yoga can be either positive or negative, depending on the person and the muscular support the person creates in the pose.
Asymmetrical Dysfunction
Scoliosis is a condition in which a person’s spine curves, rather than staying in a straight line. They can have either a primary curve called a “C curve, or secondary curves, an “S curve”. Because it results from the soft muscle tissues developing asymmetrically, our approach in treatment would also be asymmetrical: stretch the concave side, where the spine is curving inwards, and strengthen the convex side, where the spine is extending outwards. When there are two curves (S), look to work with the lumbar spine first; usually, scoliosis has developed here first, and the lumbar is the base for the thoracic.
Because the muscles on the convex side are working overtime to hold us upright, you might notice there is more prominent muscle tissue and you might think to stretch here instead. Myofascial and stretching is helpful for temporary relief but it does not create the tensegrity that is missing from these cases; if we do not strengthen we cannot rebalance the muscular tissue.
When we have a curve in the lumbar spine, it is important to start on the convex side by strengthening the Quadratus Lumborum (QL) muscle, which is the deep lateral stabilizer of the spine. A great yoga pose to do this in is Vashistasana with the convex side closer to the ground; concentrating on lifting up through the pelvis. Lifting up rather through the ribs would target strengthening in the thoracic spine. If traditional Vashistasana is challenging modify by lowering forearm, front foot, or hips onto the ground or do standing variations with a chair. Half moon is another great strengthening pose for scoliosis. Aim to hold as long as possible to take the muscle to fatigue.
Many times with scoliosis we also see pelvic shifts which is our spine’s way of adjusting our skeletal system to keep our eyes level. Leg length differences can also cause pelvic asymmetries which can cause pain in the lumbar spine or SI joint. With pelvic asymmetry, look at the individual and treat what’s tight and weak for that person – this is usually QL and multifidus along with hamstrings and illiacus.
Another great QL strengthening exercise is lying on the ground with a blanket under your torso. Draw your shoulder to your hip on the same side of the body, trying to bunch up the blanket under you. If you were doing this exercise for pelvic asymmetry, you would do more repetitions on the side that is weak to bring more strength to that side. You might hold a stretch or do myofascial release for longer amount of time on the side that is tight.
Treating a Patient
When working with someone who has back pain or injury, always begin by asking questions and taking good notes – this will help you to track their progress and see the bigger picture. It can be especially helpful to point out to your patient their progress over time for e.g when symptoms begin to alleviate, change frequency and hopefully eventually dissipate completely. Secondly, Observe their posture and their active and static range of motion. In your first meeting with your patient, this might be all that you do. If you have time on that first visit or on your future visits, you could do more active muscle tests and palpation, treat with yoga poses and myofascial. For treatment, you might even refer them to a doctor or another health care practitioner which is always a good idea if there is nerve pain. For future visits be prepared with a handout to accompany the exercises you give them, and always re-evaluate and take notes to track progress.
Some of us may be intimated in meeting a patient for the first session without knowing what is wrong with them, but the good news is we don’t need to have all of the answers or solve their problems in the first session, or ever. Simply by observing their posture in the first session, you might notice FHP or rounding of the thoracic spine and forward shoulder carriage. Then you could give them (1) a simple breathing exercise to help PNS, (2) longus colli neck exercise (3) and/or restorative chest opener to re-lengthen pec minor. Keep the exercises simple and realistic so the patient can stick with it and comes back to see you again. You might email them a hand out the next day to follow up and remind them visually what to do. If in doubt, start with breath, work on the deep stabilizers, and look at their posture.
One of the most inspiring takeaways was to hear that yoga can be up to 95% beneficial in alleviating low back pain in cases such as osteoarthritis and degenerative disc disease, and I personally experienced how working mindfully in specific areas of the spine and breath made a difference to my every day that week in Napa.

