
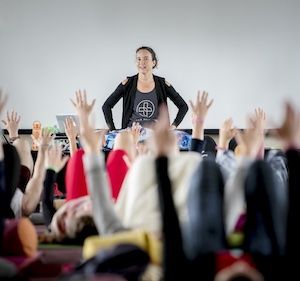


Articles, Cristina Kuhn, In the Press, Mental Health, Resources, Yoga Medicine® News
How to Create the Ideal Space to Practice Yoga at Home: Experts Tips
By Cassandra Rosas for Porch.

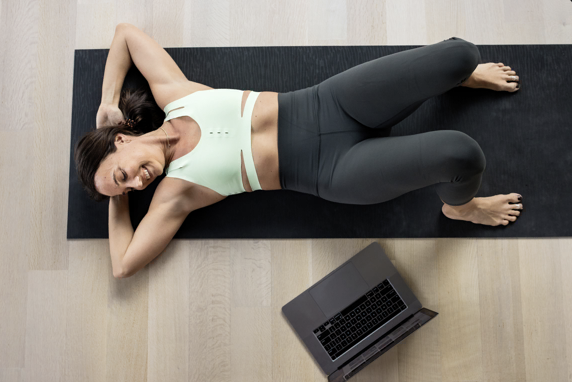
Whether you are an avid yoga practitioner or completely new to yoga, sometimes you just need a moment with yourself to slow-down and relax, and this practice seems to be perfect for that purpose, to reconnect with your body through your breath, attention to movement, and to the present moment. If that is your case, you may be wondering how to create an ideal space at home that helps with relaxation and focus, which is why we gathered the expert’s advice on how to achieve that vibe at home and the recommended exercises to do safely, either on your own or following an online or a virtual yoga class. So keep reading to discover what the experts told us!
Where would you set up a dedicated yoga space at home, and what do you need for this?
The ideal space to practice is usually the quietest one. You don’t need lots of space but plenty of natural light is always good. Clear the space of clutter as much as possible – even if it’s only the area around your mat or the end of the room where you are practicing. The less distractions, the better. I always like to face a window as it’s lovely to have the sun on your face or be able to see the sky or trees. You just really need your yoga mat and props if you use them. A plant or two can really help to make the space feel calm and more relaxing. Use an essential oil spray and mist the space before you start. Spend time sitting and connect to your breath.
By Nichi Green from The Yoga Space
How do you suggest setting up your own yoga studio at home and achieve a Zen vibe for your yoga practice?
A “home practice” is a concept that many of us have grown (willingly or unwillingly) quite familiar with over the last year!
While your yoga studio offered a chance at peace, community, and even escape; your home practice now attempts to fill those shoes. But can it?
The old saying: “where there is a will, there is a way” comes to mind here.
Here are our tips for achieving a “zen vibe” at home!
Get intentional with your space. You don’t want your “home studio” to be an afterthought 60 seconds before class starts! Find a private (or semi-private) space and consider what you love about your studio space:
Is it very simple, minimal, and clean?
Are there plants, crystals, and singing bowls?
The beauty of your home practice is you can take the best of your studio experience and leave the rest behind- this is your chance to make your space exactly what you need.
What about heat/humidity? If you are used to practicing hot yoga, this may be a stumbling block that feels overwhelming to overcome.
There are options! Hot Yoga Domes, DIY heaters and humidifiers, the outdoors, and even your guest bathroom could fit the bill!
As much as we love getting creative around getting sweaty- please remember that the heat itself does not make a practice. If you need to give up the heat for a space that feels welcoming, comfortable, and conducive to consistency, then we urge you to explore your non-heated practice with curiosity and optimism.
Ah consistency! Our last tip is to do what it takes to find some consistency in your home practice.
We have heard many a student tell us about “giving it a shot at home” and almost immediately decided it wasn’t for them. While we respect that decision, we encourage you to explore your options before writing off a home practice completely.
Space, lighting, music, ambiance, time of day, level of privacy, and your own mindset can greatly impact the experience you have!
By Monica LeBansky from Pure Yoga Texas
How can you create the perfect ambience in your yoga space to help with relaxation and concentration?
In a perfect world, we would all have a room dedicated to our yoga practice -but in reality, we often have to tuck our mat between the bed and the wall. You can make the most out of your space, or lack thereof, by attending to lighting, props, and sound. Overly bright lighting can be overstimulating, so consider adding dimmers to your overhead lights or turning on a smaller light source such as a lamp. Your props will help to make your practice more comfortable, so make sure you have at least enough room to have them nearby. Ideally, you should have enough room on either side of you, not only for your props but also to take a supine twist on each side. Lastly, many people find music to be a soothing addition to their practice. Music can not only reduce the effect of distracting noises but also it can have a powerfully soothing effect on your nervous system.
By Cristina M. Kuhn from Yoga Medicine®
How would you achieve the ideal Zen vibe at home for your yoga practice?
We would say there’s not one specific answer to this question, but overall you would need to make sure you create a corner or room with a totally different atmosphere. Don’t just start a yoga class in your living room or home office without changing some stuff around. Get out of your day to day surroundings and create a space where you can get extra zen and escape from everyday life.
By Chris Bakker from Onefit
What advice can you give us to embrace our Yoga practice from home and not lose motivation while in lockdown?
Practicing in the same room each time reinforces a connection with Yoga within the home environment, so create a dedicated space for Yoga practice. Tune into nature and beauty – even in a tiny space you can light a candle, burn incense, have fresh flowers or shells from the beach for example. This sets the tone for practice and helps to activate the parasympathetic nervous system (moving us into a more relaxed and receptive state).
Rise a little earlier each morning and start the day with meditation, movement, or conscious breathing (or all three if you have time). You will most likely feel brighter, more positive, and have increased energy, vitality, and focus. If you are not a morning person, find a time that works for you and put it in your diary – protect that time in your day.
Society, in general, is very goal-oriented, and sometimes we carry this through to our Yoga practice, hoping to attain the perfect posture or feeling that we have somehow failed to practice properly if we are short on time. When we lose our routine, we can be hard on ourselves and it can be difficult to find the motivation to start again. My advice is to prioritize doing a little every day, even if some days that means you only have time to sit and take a few conscious breaths or contemplate gratitude for a couple of minutes. The very act of making contact with your mat and moving into the present moment will make it easier to practice again the following day.
Finally and probably most importantly, find an experienced Yoga teacher who offers live Zoom classes (not just recordings), to guide you and provide live feedback while teaching – this can really increase motivation and at the same time address any difficulties you may be experiencing. It makes a huge difference when we practice as part of a live community, (even a virtual one), as we benefit greatly from the energy and support of a group, especially one with a shared desire to deepen the practice of Yoga.
By Paula from Ashtanga Yoga Dublin
Which yoga styles are best for trying at home?
Restorative and gentle Hatha are the best for practicing at home. They are slower, so less likely to injure- Iyengar too if you know it.
Ashtanga and vinyasa are more vigorous and only should be a home practice if you have already learned from an experienced teacher who has taught correct form, breathing, and focus.
Nidra and yin can be done at home too, but it might be more beneficial to have someone guiding you online.
Kundalini is quite challenging to do on your own, so I suggest online or using manuals if you have studied it before!
Any of these forms can be found online if you are not versed enough to practice at home. However, if you are new to Yoga, the first two mentioned would be safest and very beneficial.
By Donna Amrita Davidge from Sewall House
Which aspects should we consider when picking the type of yoga to practice from home?
When practicing yoga at home, there are a few things to keep in mind when selecting a class.
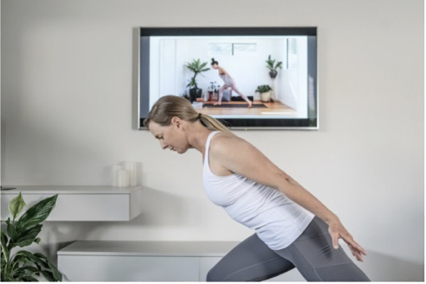
First, I highly recommend that you attend classes with a live instructor (whether in-person or virtually) who has met you face-to-face. Visual information gives yoga teachers a lot of information about how we can help you align yourself in any given yoga position. Additionally, the relationship between an instructor and student is very important in your overall comfort and it’s difficult to build this without any live interaction. Although YouTube classes can be a great way to try out yoga, there is no denying that real progress usually comes from studying with a live teacher.
Second, make sure the class you pick won’t utilize props you don’t have. Usually, we can give some ideas for DIY props you can use at home. But if you’re attending a Restorative or Yin class and don’t have some combination of pillows, blankets, bolsters, blocks, and/or straps, the class might be very challenging for you. If you pick a Yoga Burn class but don’t have any free weights, the class may not be challenging enough. If you don’t have a yoga mat, you can use a towel instead.
Third, if you’re just starting out, very inflexible, or recovering from a significant injury, picking a very fast-paced or difficult class (level 2 or 3, power yoga, ashtanga yoga, etc.) may not suit your body just yet. You might prefer to start in a gentle, beginner, or level 1 class to get your bearings before you advance your practice so that you don’t hurt yourself. Remember, there’s no rush!
Most importantly, practicing yoga should feel good. If you ever feel pain, back off and consult with a registered yoga teacher (RYT).
By Erin Haddock from Five Keys Yoga, LLC
What is the easiest style of yoga to start practicing at home as a beginner and should be taken into consideration?
If you are new to yoga, welcome! When you first start, it’s great to work with a yoga teacher 1-on-1 so that they can access your current fitness level, help you to learn the correct breathing and poses, and help you work with any injuries or pre-existing conditions. If that is not accessible to you financially, I would recommend trying a slow flow class or a level 1 Hatha vinyasa class. If you don’t see these types of classes on your local studio’s schedule, reach out to the studio to ask them what the most beginner-friendly class is! Always make sure to let your yoga teacher know if you have any injuries or anything going on in your body so that they can help you modify poses. Once you are familiar with the basics of yoga, it’s great to try a variety of classes to see what you like most.
By Amanda Kingsmith from Mastering the Business of Yoga
What is the easiest yoga sequence for a beginner to do at home?
An easy way to start your yoga practice at home is the traditional Sun Salutation A, which is a set sequence of yoga poses that are linked to each other in order to create a smooth flow of movement.
Once you’ve found a nice and calm spot at home to roll out your yoga mat, step on the front of the mat with the feet hip-width apart. Bring your hands in front of your heart, close your eyes and take a few breaths to tune into your body.
On an inhale, open the eyes and lift the arms up over your head. Exhale and bow forward, bringing the fingertips to the ground. You can bend the knees as much as needed.
With the next inhale, make a big step back with the right leg so that you’re in a runner’s lunge position. The fingers are still on the ground, and you lift the chest and the head up.
Exhale and step the left leg back as well to arrive in the iconic position of Downward-Facing Dog. Lift the buttocks up and push the tailbone back until your ears are between the biceps. You can keep the knees bent to have more space to tilt the pelvis forward and lengthen the back. Imagine the pose as an upside-down V.
With your next inhale, shift your body weight forward so that your shoulders are stacked above the wrists, and you arrive in a push-up position. Exhale and lower the body down to lie on your belly. Lift your head and chest up with the inhale and exhale to return to Downward-Facing Dog. Feel free to stay here for a few breaths and tune into your body again.
With an inhale, step the right foot forward between your hands (or grab the foot and place it there) and lift the chest and head up again. You’re now in the same runner’s lunge position as in the beginning, just with the other leg in front. Exhale and step the left foot forward to meet the right one at the front of your yoga mat. With the inhalation, you lift the torso back up into a standing position and bring the arms overhead. Exhale to bring the hands in front of the heart again. You are now in the starting position and can repeat the same sequence starting with the left leg.
As you may have noticed, this is a closed-loop, and you can repeat it as many times as you like. This simple sequence moves all the limbs of the body in various directions. Depending on the speed at which you perform it, it also trains your cardiovascular system, raises your awareness and calms your mind.
If you’re looking for more inspiration for your at-home yoga practice, check out TINT Yoga, where you can train with the world’s greatest yoga minds and find classes for all levels.
By Doreen Stolle from TINT Yoga
What is the best advice you can give us for practicing yoga at home?
To experience the most benefit from your yoga practice, consistency is key. And to develop consistency in your home yoga practice, your best bet is to make Yoga a part of your daily routine. Many people find that the best time to practice Yoga is first thing in the morning before their children wake up, and other life responsibilities take over their day. Everybody is different, so you’ll have to figure out what works best for you. Are you more likely to be able to practice during your lunch hour, after work, or before bedtime? Spend a little time reflecting on what time will work best for you, then commit to it by scheduling it as an appointment on your calendar. Make your best effort to practice every day, but if life gets too busy and you miss your practice one day, don’t stress over it. Just try again the next day.
The second key to developing a successful home yoga practice is finding the right style for you. There are many, many styles of Yoga. You can find Yoga that is fitness-based, spiritual, gentle, strong, beginner-friendly, chair-based, relaxation-focused – the styles of Yoga are endless. Start out by trying a class or video. If you love it, great! If you don’t love it, try something else. You’ll eventually find a yoga practice that’s just the right fit. Yoga can provide so many benefits for your body and mind; it’s just a matter of finding the right approach for you.
By Zelinda Yañez from The Yoga Room
Which tips can you give us to inspire our daily yoga practice at home and not lose motivation?
There are benefits to be discovered in your home practice altogether. Whether you are new to yoga and looking to start your practice or a lifelong yogi seeking to maintain motivation, here are some ways you can inspire your practice at home.
#1 Keep your mat rolled out. It sounds simple, but it really works. Skipping the step of having to actually roll out your mat limits the time your mind has to talk you into doing something “more important”, which trust me, we all do. When your mind thinks yoga, you simply go to the mat and do yoga. This also allows the opportunity for your body to tell you when it is time to practice as opposed to the logical mind choosing a time. Sometimes a simple inversion like Adho Mukha Svanasana in between work emails is better than a cup of coffee (and yes, down dog is an inversion!).
#2 Create your safe space. Create a safe space for your mat. This can be next to your bed, a corner of the living room, or in that spare guest bedroom that is never used. It doesn’t matter where or how much space there is, it just needs to fit your yoga mat. Liven the space up with whatever makes you happy. Some ideas include a colorful tapestry, candles, essential oil diffuser, palo santo, and of course, house plants. It will be your sanctuary so make it the cozy place that you want. Make a commitment to yourself that when you are on your mat, in this space, you will treat it as you would a studio. No shoes, no phone, and no expectations!
#3 Find your Flow. Practicing at home is an excellent opportunity to dive into your own personal movement. In all reality, yoga instructors are here to guide you through your own personal journey of yoga. Therefore, YOU are your biggest teacher and you learn from listening to your body. Take this opportunity to throw on some music, close your eyes and move in whatever way you feel called to. Being alone gives you the luxury of not worrying what others may think, so let loose!
By Nicole Lennox from Yoloha Yoga
What kind of props do we need to have at home for a restorative yoga session?
Restorative Yoga is an incredibly beneficial tool, especially for busy, stressed, or very active people. On our 4-day Restorative Yoga Course at Byron Yoga Retreat Centre we teach participants how to use an abundance of blankets and bolsters to correctly set up positions to support their bodies to allow them to fully relax in each pose. While there is an abundance of websites and shops selling a myriad of yoga props, you can always just make do with soft furnishings you have at home.
If you are practicing some Restorative poses at home, you can use any blankets or cushions you have around the house and adapt by rolling or folding them to meet the needs. You don’t even need a yoga mat! You could use a blanket, a rug, or just a carpet as your base. If you choose to, then I would say the number one prop to invest in is a yoga bolster. This will make it easier for you to set up for and be properly supported in key Restorative poses.
One of the most beneficial Restorative poses is legs up the wall. You simply set yourself up at right angles to a wall, torso on the ground, sit bones up against or close to the wall, and – as the name suggests – legs up the wall! All you need for this pose is a blanket to lie on … and a wall.
Restorative Yoga can help with physical, emotional, and mental issues by restoring balance. Practicing just a few key poses regularly can assist those working with conditions such as high blood pressure, adrenal and chronic fatigue and is particularly useful for women’s health and for pregnant women. Restorative Yoga offers supported postures that facilitate the passive release of tension stored in the body, activates that parasympathetic nervous system, and allows for deep, nourishing rest.
For more information on the 4-day Restorative Yoga Course go to Byron Yoga Retreat Centre.
By Becky Buckwell from Byron Yoga Centre
Which tips can you give us to create a yoga sequence to practice at home?
Cultivating a home practice is an important part of developing an authentic relationship with Yoga. Practitioners can create simple sequences at home that help them intuitively connect to their breath and their body. When we develop the skills to create sequences for our home practice, we strengthen our bond with Yoga. Follow these steps to create safe and accessible sequences for your home practice.
First, find a place to roll out your mat. You want the space to be bright, clean, and relatively quiet if possible. You might want to bring in items that help you connect to your practice like blocks, bolsters, blankets, and a strap. It’s nice to add little touches that help you connect to the five elements like incense, crystals, singing bowls, or salt lamps. If you have space and the supplies to make your yoga space your own, you will be more likely to practice.
Next, you want to start slowly. Explore your range of motion in the hips, shoulders, and spine. Notice where you are tight, where you are more flexible, and where you feel unstable. You might start in a tabletop position or flat on your back; from here, you can move the legs, arms, and spine to notice where there is sensation. Link your movements to your breath. If you are looking for energy, you can use your inhales when you expand and exhales when you contract.
An example of this is cat and cow poses. When you inhale in cow you are bringing breath into the body when the spine is in extension. When you exhale in cat, you are releasing breath when you contract and flex the spine.
Keep moving with the breath and adding on postures that increase flexibility in areas where you feel tight and adding postures which build strength in areas that feel more flexible. When we build strength and flexibility, we increase stability overall. An example of a pose that invites flexibility in the hips might be Warrior II and an example of a posture that builds strength in the pelvis is crescent lunge. Listen to your body, resist the urge to push yourself to your edge. We actually want to work within our range of motion so that our range of motion and strength will build over time. When we lean into our edge, we can invite injury.
Take up space and express yourself as you feel appropriate. A home practice is a beautiful way to develop a deeply personal relationship between yourself and your body. Listen to your body, honor your body, and use your breath to bring your awareness back onto the mat when you get distracted. Over time, your practice will help quiet the mental chatter that distracts us from our present moment. When this happens, you can start to notice how your body responds to certain postures; you can use your breath to regulate your nervous system and maintain balance and peace of mind.
Developing a home practice and sequencing intuitively is easy to do when you listen to your body through a process of self-inquiry. Over time, this will help you take these valuable skills off the mat and into your life.
By Michelle Young from My Vinyasa Practice
Which tips can you give us to make time for our yoga practice at home and stick to it without losing motivation?
When it comes to practicing at home, we realize that it can be tough to stay focused. That is why we have a few recommendations that will help you find focus and clarity as you work to build your home practice:
- Find a space: your home space should be a place that you can dedicate to practice. A space that you can focus and relax without distraction. Avoid areas of heavy traffic, loud noises, and pets (even though we love them to pieces; it can be hard to show yourself love when your pup says it’s time for a WALK).
- Declutter: It’s important to remove all excess clutter from your practice space. Clutter is just another distraction that can leave you feeling anxious. By decluttering the junk, you declutter the mind so you can stay focused on yourself.
- Plan ahead: get a calendar and hang it somewhere that you will see it daily. Schedule your yoga practice and write it on the calendar. Make sure you are specific with the time and day. This will be a subtle reminder to show up for yourself a little every day, and it will help you stay on track even when you have 101 excuses.
- Play music: Music can have many benefits. Make sure the music sets the stage. If you are doing a very active practice you may want to choose songs that keep you motivated. If you are doing a meditative practice you will want something more soothing and calm. Whichever you choose, you can use the music to help stay focused while drowning out any background noises.
Building a home practice can be very rewarding. We recommend following these few simple tips to help you stick to your goals as you develop your home practice.
By Jess Bycraft from Torch Yoga
Which yoga postures do you recommend practicing to ease the fatigue of working from home?
One of the greatest challenges of working from home is inertia. We’re spending a lot more time seated with fewer reasons to get up, get supplies, move to another room for meetings, or interact with co-workers. This can lead to sluggishness and mid-morning and/or mid-afternoon lag. Movement is a natural neuromodulator and can help improve focus and productivity, so get up and try this simple sequence once or twice a day.
- Stand up and reach your arms over your head, clasping your left wrist with your right hand. Take a deep breath, stretch up to the ceiling and slowly bend to the right on an exhale. Hold for 2-3 breaths using the inhale to stretch the left side and exhale to come deeper into lateral flexion. Repeat on the left.
- Keep your arms over your head, interlock your fingers and flip your palms to the ceiling. Take a deep inhale breath, look up, lift your chest up, and create a long body stretch. If you’re comfortable, reach over your head and feel a slight backbend.
- Inhale back to center and fold from your hips, placing your hands on the desk in front of you. Relax your neck, drop your head and chest, and slowly try to straighten your legs in an upside-down L position.
- Come back to a standing position. Separate your feet hip-width, toes turned out, and slowly sit down into a squat position, as low as you can go comfortably. Press into the floor, squeeze your buttocks, and stand all of the way up, opening your hips. Repeat 5-10 times, slowly if you’re feeling stiff and increasing speed if you’re looking for an energy boost.
Repeat the whole sequence to fill 5-8 minutes or until you feel a noticeable shift in your mood. To really top it off, finish with a minute of somatic heel drops. Shift your weight to your toes and lift your heels. Keeping your body, shoulders, and face relaxed, rapidly bounce up and down so that your heels barely touch the floor. Use each downstroke to release more tension from your face, jaw, and upper back. You might feel a little silly at first, but you’ll feel amazing after!
You can check this YouTube video to help guide you with the movements.
By Sara Curry from Blaze Yoga & Pilates
Which asanas do you suggest doing for pregnant women who want to do prenatal yoga at home?
Yoga is great for pregnancy, but one has to be careful that they don’t ‘overstretch’, which can happen because the body produces ‘relaxin’ in preparation for birth. Once overstretched, ligaments cannot go back to ‘normal’.
In my experience, having taught many prenatal yoga classes, there is one particular pose that I would specifically recommend….
This pose helps not only stretch fascia, but can help with a common pregnancy condition; plantar fasciitis, and help prepare for the ‘discomfort’ of labor, enabling the practitioner to ‘breathe through the discomfort’.
Come to all fours, bring knees together and curl toes under behind you. Reach back to curl any reluctant toes under.
Have a folded blanket handy, which can be placed between the calves and back thighs if necessary, so there is no discomfort in the knees
Bring the sit bones to the heels and roll the inner thighs towards the floor. Take one hand at a time to the kneecap and lift the knees slightly to release any tightness around the knees. Lift the pelvic floor muscles and draw the lower abdomen (between the pubis and naval) back to lengthen the flesh of the buttock down towards the toes and avoid overarching the lower back.
Sit up straight with a long spine, take a deep breath in, and open the arms to the sides in line with the shoulders, palms facing forward. Draw the arms back to open the chest, but careful not to overarch the lower back.
With a full breath out, sweep the arms forward, place the palms together and tuck the chin towards the chest so you get a stretch in the upper back muscles and lengthen the whole back of the spine.
Repeat as many times as possible – 10 times if possible, then lower the hands, and untuck the toes.
We call this pose ‘Toecrushna’
By Suzanne from 532Yoga
What kind of asanas do you recommend for a pregnant woman to do at home?
Modified yoga poses and movement can really ease the aches and pains that come along with pregnancy. Try a “down dog at your countertop” by placing your hands on the kitchen counter or a table with arms straight. Move your feet back about 3-4 feet and lean your chest forward until your torso is parallel to the floor, and you feel a nice stretch in the shoulders.
By Jess Pierno from Yoga Heights
Which items and props would you suggest having at home for practicing yoga with kids?
The only thing you need at home to practice Yoga with kids is space to move. A yoga mat is nice, but not necessary.
We suggest eliminating, or at least minimizing, all distractions (especially screens), including props, until children are in their teen years. What’s needed most working with growing bodies, brains, and hearts is presence. Your full attention – playful, calm, and connected. This is the greatest gift you can give.
Parents and children of all ages can breathe, move and rest together modelling nature’s teachers like mountains, stars, trees and animals or download our IYK® High 5 Method for all ages. These healthy, happy habits help you be Your Best YOU and create a Positive Force in our world.
By Michelle Wing from It’s Yoga Kids
What are the best yoga poses to teach kids practicing from home?
Would like some new quick, and easy tools for calming your kids? Perhaps you see the impact of stress and anxiety on your children and want to help? Or maybe you do Yoga and would love to share the benefits with your family.
Welcome to the world of teaching yoga to your kids and to the community of thousands of parents all over the world who are not only doing something fun together but also taking care of the physical, mental and emotional well-being of their children at the same time.
Take just 10 minutes at the beginning of your day to get those little bodies moving, energize them in a calm way, and clear the brain for a focussed, calm, and happy day.
Do this together, and you will both enjoy the benefits of increased health and greater connection.
Top Tips For Yoga With Your Children
- Get Moving. The fastest way into children’s minds, emotions, energy and physical health is through movement, but not any movement. Use fast, repetitive yoga movements that synchronize the breath to channel energy and calm the mind and emotions.
- Breathe. The breath is the key that distinguishes Yoga from all other forms of movement. The inhale and exhale play a significant role in having a specific effect on the body and mind. Watch your child calm down quickly when you include the breath.
- Have Fun. Yoga for children is not the same as adult classes, and unless children are engaged and having fun they will soon lose interest. This doesn’t mean that Yoga has to be silly, and all play with no physical substance. Bring the play to the asana rather than the asana to the play.
- Make it Special. Yoga with your child will be one of the best memories you have together. It will be a time each day that you cherish, where you connect and that they remember for the rest of their lives. Always start and end your practice together with a special ritual to connect you to the practice and each other.
Yoga for Building Strong Backs:
- Back Release. Lying on back. Knees bent. Hands behind head. Squeeze knees. Exhale, drop knees to side. Inhale, back to centre (x 10).
- Froggy Legs. Lie on back. Hands behind head. Soles of the feet together in a ‘froggy’ legs position Exhale, Lift hips. Inhale, back down (x 10).
- Cat/Cow. Come onto hands and knees. Inhale arch back up to the ceiling, suck belly up and round the spine. Exhale, drop the belly down, lifting the chin and looking up to the ceiling (x 10).
- Swimming. On belly. Forehead down. Arms and legs out wide into a starfish. Exhale, Lift Right arm and Left leg up. Inhale, down. Exhale, Lift Left arm and Right leg up. Inhale, down (x 6).
- Cobra with knee bent. On belly. Hands near your shoulders. Elbows in close to your ribs. Bend one knee out to the side. Place foot of bent leg next to the knee of the opposite leg. Exhale, straighten arms, lift the chest off the mat. Face looking up. Inhale, lower down (x 10).
- Belly Swings .On belly. Hands interlaced behind the head. Feet wide apart and toes dug into the floor. Exhale, lift the chest off the floor. Inhale. Exhale, twist to your right and look at your right foot. Inhale, back to centre. Exhale, twist to the left and look at your left foot. Inhale, centre (x10).
Have fun doing these sequences with your kids, and at the same time, you’ll be strengthening your own back.
Enjoy the magic of seeing your children grow in confidence as their sense of self builds.
If you see the immediate benefit and impact on your children and want to learn more, then come join our kids yoga online training course. It can be one of the most rewarding things you do.
By Loraine Rushton from Zenergy Yoga
How can we introduce yoga to kids when practicing from home to awaken their interest in the practice?
As a certified children’s yoga instructor, and a mommy, I’ve had the pleasure of introducing yoga to young children, starting at toddlers on up–and oh what fun it’s been! You may even see your younger baby doing some traditional yoga poses naturally (downward dog and happy baby are some early favorites)! Kids and yoga just make sense–kids love to move, and they have great imaginations, allowing them to bring the poses to life with an extra element of fun. Yoga all started with poses that were created to imitate things around us. The mountains, trees, animals…and kids are great at “make-believe”! As a bonus, yoga does some really great things for our bodies and our brains.
What Age Should we Start At?
I’ve found that preschool age, on up, is a perfect fit! Children 3 and up really grasp the instructions, and know-how to listen to their bodies if something doesn’t feel right or is too hard, and can communicate that important safety aspect with you. Some 2-year-olds will be able to follow along with some of the early poses, but I would caution against going beyond a few beginner yoga poses at a time, unless working with a professional kids yoga teacher. Occasionally young toddlers will just be rolling around and come into a perfect yoga pose on their own, out of nowhere. Downward Facing Dog is an early favorite, even with kids as young as 1 or 2. If you see it, cheer it on. “Hey, you are doing yoga! That is a doggie pose–way to go!!”. They love the praise and will most likely repeat the pose several times. They also love to follow along with big siblings or hold hands with mom and dad while trying out standing poses. That’s awesome! However, remember that toddlers don’t have great balance yet, and should always go at their own pace.
What You Need
- Comfy clothes to move and stretch.
- A safe, open spot to move around (carpet, or on a rug/mat works best to avoid slipping and to protect tender kiddo tailbones).
- MOST IMPORTANTLY – yoga poses that are adapted to be age-appropriate for kids!
What Poses Should I Start With?
Keep it simple and playful! Even if you are an experienced yogi yourself, you want to make sure to keep the children’s yoga poses very basic to avoid injury, and to keep it engaging for little ones. Play up on that imagination–I’ve found the most favorite beginner poses are the ones named after things kids love the most (airplanes, stars, dogs, cats, snakes). Open a children’s picture book, find animals and objects you might remember a yoga pose for, or create one together! This also provides a very fun format and structure for your yoga adventure. Encourage sounds and smiles! Children’s yoga doesn’t have to be silent and serious, although of course, you can teach breathing, mindfulness, and stillness along with playful poses. All of which are beneficial for our bodies and brains.
Start Slow & Encourage — as, with anything new, some kids may want to watch you a few times before they feel comfortable trying themselves. Let them know that balance, strength, flexibility, are all things that take practice. They will get better the more they try (but don’t force it–that takes the fun out of “playing yoga!”). P.S. Try not to over-correct. If the poses don’t look “perfect”, that is just fine! As long as there is not a risk of injury (for example: putting weight on their head or neck, overstretching, falling over), then generally, it is best to let your children express themselves in whatever way they enjoy doing the pose.
Praise is Key! Use lots of excitement, and like any new thing your children are learning, when they figure it out, cheer for them!
Verbal Prompts. Once you and your children are familiar with the poses, you can shorten the instructions down to prompts such as: “Show me your butterfly wings!” “Can you squat like a froggie?” “Do your doggie yoga pose!” (then, of course, follow with praise!).
With Safety in Mind. As with any “exercise” program, you definitely want to have some basic understanding about proper alignment and safety from a professional before you, yourself, give it a try, or try to instruct your kids. Become familiar with the do’s and don’ts of the poses first, so that you can safely teach them to your kids. It also helps to find a certified yoga teacher, that specializes in children’s yoga, who can give in-person advice on proper alignment, and getting the most benefits out of the poses. 3 super important guidelines to be aware of:
- Remind kids to keep breathing throughout the poses. It’s best to avoid any poses that put pressure or weight on the neck or head. (example: fish pose).
- Let children go at their own pace. Don’t try to move their body into a position, or push them into a deeper stretch. This can lead to injuries. Use words to instruct, and better yet, demonstrate the pose yourself, for your little one to copy.
Adding fun noises, or other teaching points/questions (“What color is your butterfly?”) just adds to the experience! Showing them a picture of the pose, or a picture of the object/animal you are teaching also helps spark the imagination of how the pose should look.
Small stuffed animals or toys work great as props. For example, you can teach downward facing by placing a toy in front of a small toddler and asking them to reach their hands down on the floor next to the toy and balance. Or have them reach their toy high in the sky during extended mountain pose. During bridge pose, drive a toy car under your child’s bridge to bring it to life. When teaching breathing exercises, use a small stuffed animal to show how the belly rises high during a full inhale (buddy goes up), and the belly sinks back down on a full exhale (buddy goes down). So many fun ways to use lovable toys during your yoga play. Of course, group lessons are a fantastic way to learn and explore yoga. Many classes have gone virtual these days too. For more tips and class information, here is a great place to start.
By Amber Johnston from Little Twisters Yoga
What is the best way to introduce the yoga practice to a teenager from home?
Scientific studies have proven that yoga can have a positive impact on one’s mental and physical health. Teenagers have suffered from the loss of their social and academic communities, due to the COVID-19 pandemic, and this has negatively impacted their mental health. The practice of yoga may help teens navigate through this difficult time.
During the more than 30 years that I have been teaching yoga, I introduced the practice to many students who were teenagers. Based on my experience, the following suggestions may be helpful in introducing the practice of yoga to teens:
- Welcome the individual, or class, to the session with a smile (or find a class or teacher who does this). Teens are going through many changes, offering an inviting and engaging space is important.
- Storytelling is an ancient, cross-cultural practice that has been used for millennia to establish a connection. Consider sharing (or finding) a story about the practice of yoga or any story that reflects the teen’s interest. Teens may sometimes appear distracted, or disinterested, sharing a story will help them focus and become centered.
- The breath is important as it promotes relaxation and increases awareness of one’s body. Introduce Dirgha (three-part breath) or Sitali (cooling) breath; the art of rolling the tongue may be of interest to teenagers. Teachers should maintain awareness to their own breath to help stay connected to students.
- Use physical or mental images of humans, animals, plants, etc. to engage teenage students.
- Select or help them choose postures that are easy to do; this often help the teen develop an individual practice.
- Encourage ending the session with the practice of relaxation. Teens can sit or lie on their backs in Savasana (repose). I suggest appropriate music during this time. Relaxation is usually 10 minutes; use your own discretion.
- After relaxation, students can be offered the chance to share their feelings. End with the change of Om or place hands in front of the heart (palms together) and bow the head. Make time for the next session!
By Maya Breuer from Yoga Alliance
Now that you have all the insight and advice from experienced yoga professionals, you can create your special yoga space at home and start putting to practice some of the exercises, postures, and sequences proposed. You’ll see that in no time, you’ll have your yoga routine all settled down.