


Articles, In the Press, Rachel Land, Resources, Spine, Yoga Medicine® News
The 18 Best Yoga Poses for Beginners
By Timothy Burgin for Yoga Basics.

If you are new to yoga, you might feel overwhelmed with how to safely and adequately perform all of the yoga poses. We have over 120 different yoga exercises listed in our asana index–fortunately, you don’t need to learn them all when you are just starting yoga. There are a handful of foundational yoga poses that share common alignment and muscular actions with all of the other poses. Even though there are hundreds of asanas, most yoga classes repeat the same primary ones. Becoming familiar with these fundamental poses will be essential for you to learn so you can feel comfortable going to a yoga class or can be safe practicing on your own at home.
We reached out to eleven yoga experts to get their recommendations for the most essential yoga poses that beginners should start with learning. We also asked them for their tips and advice on how beginners should approach these asanas and how to modify the poses to make them approachable for newbies. We recommend that you follow the link to the yoga pose instruction page to see the step-by-step instructions on how to perform each pose. If you are brand new to yoga, take your time to absorb all of this info, and always listen to your body and alter the posture to best suit your body’s level of ability, strength, and flexibility.
1. Cat and Cow (Marjaiasana / Bitilasana)

One of the most essential and easiest yoga poses for a beginner to learn is cat pose and cow pose. Yoga Instructor Brooke Nicole Smith explains that “this sequence connects movement with breath, moves through both flexion and extension of the spine, and allows the practitioner to experience stillness at the apex of each movement, as well as in a neutral spine position between the movements.”

“The key benefits are improved awareness and depth of breath as well as heightened awareness and control of spinal, shoulder, and pelvic position/movement. In other words, this pose helps new yoga practitioners experience the connection between the spine, shoulders, pelvis, and breath. These small movements and connections facilitate the understanding of alignment in so many other poses (e.g. understanding internal and external rotation of the hips makes more sense in the context of how the pelvis connects to the spine). This pose makes me feel deeply connected to and present in my body. When I practice it, my awareness goes directly into my body. My mind quiets. The sensations of my breath, my movement, and my body capture my full attention. I experience peace.”
“This movement and action of the spine is found in many other yoga poses, so it is considered a foundational pose for beginners to understand and master. If you have wrist discomfort or pain, you can use fists or place your forearms on a bolster or blocks. This spinal movement exercise can also be practiced in a seated or standing position.”
2. Easy Pose (Sukasana)

The classic seated pose with legs crossed and a straight spine isn’t always easy to do. Most yoga classes will start off in Easy pose, so it is essential to know how to make this beginner pose as comfortable as possible. As Yoga Teacher and Yoga Therapist Donna F. Brown tells us, “Easy pose is often difficult to do as most people do not know how to sit still for even 5 minutes in our chaotic, fast-moving society! This pose helps beginning students to establish a seated foundation for their practice, is a common pose for learning the art of meditation, and encourages lengthening and proper alignment of the spine. Sukasana also is very calming for the mind and body, and enables concentration.” To make Easy pose easy, try sitting up on a cushion, folded blankets, or even a yoga block. If your knees feel achy, support them with blankets or blocks.
3. Mountain Pose (Tadasana)
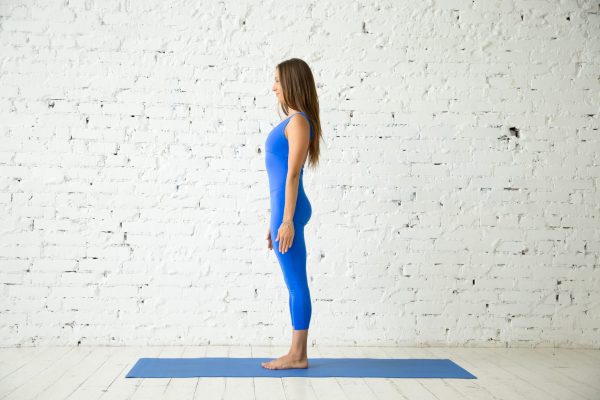
The foundation of all standing poses is Mountain pose. Laura Finch, founder of Yogakali.com, believes that “Tadasana is the most crucial yoga pose for beginner yogis as well as for yoga teachers who work with entry-level students. Before diving into more intricate yoga poses, both students and teachers have to analyze the foundation. From the anatomical point of view, Tadasana is the basic posture that carries a pool of information about where our mind and body are at the moment. What’s more, Tadasana reveals the uniqueness of each and every body, creating the opportunity for creativity instead of blindly forcing our bodies into the “perfect” shape we’ve seen on Instagram.”
“Tadasana is perfect for beginners and accessible to the majority of able-bodied yoga students. Opening a yoga class with Tadasana is a perfect moment to detect what’s “broken” and set an intention for the yoga practice. From reflecting on our emotional well-being, and hinting previous injuries to revealing adverse lifestyle patterns, the way we stand is the best indicator of what we need to focus on in our yoga practice today. I find Tadasana to be extremely grounding and soothing. I treat it as a sort of standing Savasana, a chance to connect with the breath, center, and scan the body and feelings.”
Mountain is also a pose that Donna F. Brown deems essential to the beginner. She notes that “standing still and maintaining good alignment can be difficult for most people. When you are in Tadasana, every muscle group in your body is utilized to hold you erect. The dynamics of the pose begins in the grounding of the feet to establish balance, and the energy travels from the feet up the legs and thighs and spreads to the entire body. The hips and abdominal muscles are engaged, and this helps to properly align the spine. The shoulders are relaxed, and the head is centered directly over the spine. This pose creates a sense of steadiness, power, and strength, and thus, the name, Mountain pose.”
If you’re struggling with feeling stable in this pose, try to have your feet wider apart. You can also practice the asana against a wall for extra support and to help you properly align your spine in the posture.
4. Downward Facing Dog (Adho Mukha Svanasana)
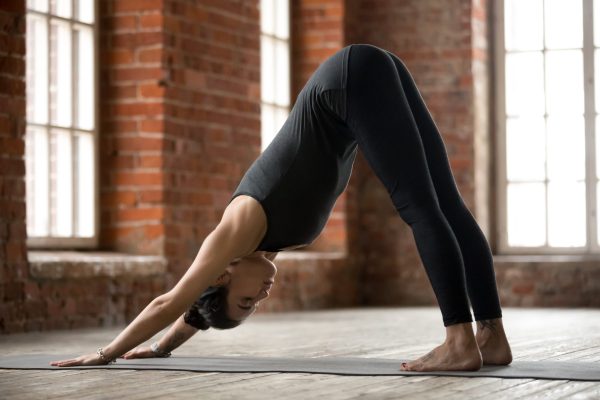
One of the most practiced poses in a yoga class is Downward Facing Dog. This pose is often used as a transition between poses and can eventually become a great place to catch your breath in a fast-flowing class. Kelly Clifton Turner, Director of Education of YogaSix, tells us that this pose “can be challenging, but the fastest way for me to feel better in my body is to move into Down Dog for 5-10 rounds of breath. It decompresses the spine, all the way up through the neck, letting the head hang heavy. It lengthens the hamstrings, which is a great counter for those who either sit a ton or are super active (think marathon runners and cyclists, whose hamstrings are always firing). It opens the chest, allowing for easy and smooth breath. It is both grounding and energizing, and will leave people feeling better in their body with just a minute or two of practice. Place one block under each hand (at the lowest height). This helps release pressure from the shoulder girdle, which allows you to focus on maximizing the length in your spine.”
Adho Mukha Svanasana is also one of Donna F. Brown’s favorite poses. She tells us, “This pose strengthens, tones and energizes the entire body! It also is an inversion pose that improves circulation to the brain, head, and neck, and strengthens the shoulders and arms, and legs. Many students lean too much on their hands and need to focus more on centering their body weight back toward the legs and up toward the hips.”
5. Cobra Pose (Bhujangasana)
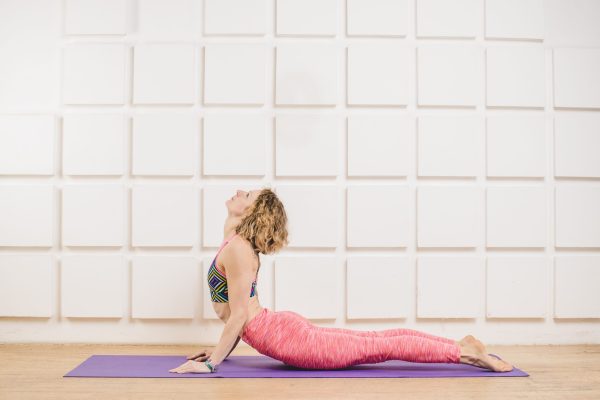
The most foundational and commonly practiced backbend in yoga is Cobra pose. Yoga Medicine® instructor Rachel Land, advises us to “think of Cobra as the antidote to a slumped posture. All backbends broaden the collarbones and lift the sternum, opening up space for better breathing and even digestion. Because the backbend in Cobra is against the downward push of gravity, it is particularly helpful in awakening back body muscles that commonly weaken when we sit a lot, as most of us do in modern life.”
“Backbends feature regularly in yoga asana practice, but deep backbends are challenging for many of us, especially for newer students. This pose encourages us to practice three actions required to make deeper backbends more accessible:
- Posterior pelvic tilt: lifting the lower belly or lengthening the tail creates more space in the low back and lengthens commonly tight muscles on the fronts of the hips.
- Deep abdominal engagement: cinching around the waist even as the skin over the belly lengthens can help transfer the sensation of the backbend away from the lumbar spine to the targeted areas of the chest and upper back.
- Scapula retraction: squeezing the shoulder blades back toward the spine helps to lift and open the chest, creating the heart-opening benefits of the pose.”
“We sometimes confuse pose depth with pose quality, but it’s not necessary for a backbend to be deep in order for it to be beneficial. So rather than aiming to lift your chest as high as possible, practice the three actions outlined above to open your heart and lengthen your hip flexors without creating any compression in your low back. Some students feel best with their legs together, some with legs hip-width apart, and some with the legs wider; be willing to experiment to see what feels best for you. Finally, looking down or forward rather than looking up can also help you focus the sensation on your chest rather than your neck.”
6. Crescent Lunge Pose (Utthita Ashwa Sanchalanasana)

Part of a traditional sun salutation, Crescent Lunge is also the foundational yoga pose needed to build up the necessary strength and proper alignment to perform the Warrior lunge poses. Tom Johnson, Yoga Teacher with Enjoy Community Wellness, describes Crescent Lunge as “an important pose which builds heat and strength in the body, preparing the body for more complex poses. Crescent Lunge uses and integrates muscles of the entire body (legs, core, arms), lengthening and strengthening the upper and lower body. It builds balancing capability and prepares the student for Warrior I pose.”
“Crescent Lunge is an awesome pose to counteract the negative effects of a sedentary lifestyle as it opens up the chest, core, and hips in precisely the opposite direction from sitting. Crescent Lunge lengthens and tones the arms, legs, hip flexors, foot, and toes; and strengthens the legs, hips, and butt. Crescent Lunge is a strong and powerful pose for the mind and body. It encourages beginners to practice the power of concentration and gives them an opportunity to own and fully occupy space on the mat. This is a common pose to warm-up the big muscles and joints of the body to prepare for more challenging postures.”
“This pose is commonly entered into from Downward Facing Dog with the back leg straight, which is challenging for both beginners and experienced practitioners. So, the beginner may want to drop into a neutral table-top (on hands and knees), place one foot forward between the hands, then lift the back knee and straighten the back leg. What’s most important is to establish a strong base by planting the heel of the front foot underneath the knee, creating a 90-degree angle at the front knee. This may require “helping” the front foot into place by taking a couple of steps forward to get the knee over the heel. Beginners may also want to keep the back knee down on the mat and focus on building the base in the front leg.”
7. Triangle Pose (Utthita Trikonasana)

Understanding how to align the arms, legs, shoulders, and hips in multiple directions is a key teaching of Triangle pose. This foundational pose is much trickier than it looks, so approach this posture with patience and persistence. Certified yoga expert Mackenzie Shier notes that “Triangle is a great posture with a lot of benefits while being accessible for most people regardless of yoga experience. This pose strengthens the legs, obliques, core, and back while stretching the hamstrings and calves as well as the groin muscles and chest. A common pitfall in this posture is allowing the ego to drive the lower hand all the way to the floor and allowing the body to come forward in order to do so, thus losing many of the great benefits of the posture as well as possibly putting the lumbar spine in jeopardy. A great way to avoid this is by either turning the palm up, so there isn’t weight in the lower arm or even by practicing this posture against the wall. If practicing against a wall, go down only as far as the back remains fully on the wall. It may feel more difficult, but it helps to ensure proper alignment and opening of the chest.”
“Triangle is one of the first poses taught to beginners and practiced in more advanced classes too,” notes Tom Johnson. “It’s a playful way to make shapes with the body while grounding down into the earth and opening the body. It helps build balance and is a preparatory pose for more advanced postures like Half Moon Pose (Ardha Chandrasana). Done with a strong base and proper alignment, the student will feel strong, balanced, and open.”
“As a beginner, focus more on creating a strong base with the legs and seeking length and alignment in the spine. Don’t worry about reaching the hand to the floor–use a block to bring the floor up to you, so you keep a solid alignment of the spine. Also, wedging the back foot against a wall can help create a strong base from which to extend the spine.”
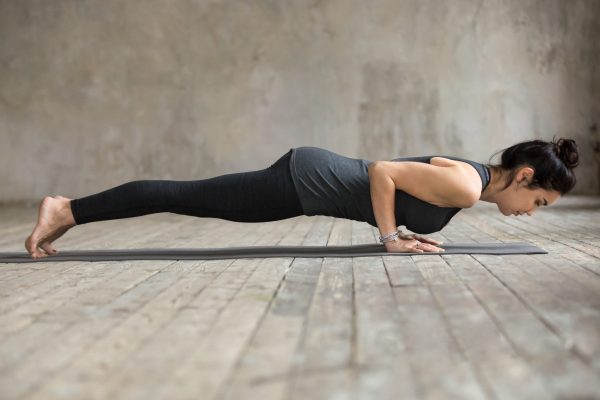
8. Plank Pose (Kumbhakasana)

Many yoga newbies struggle with having the necessary upper body strength to protect the wrists from strain and to further advance in the practice. Plank pose provides this foundational strength. As Rachel Land notes, “Several key yoga poses require us to bear our weight on our hands, something that most of us don’t often do in daily life. It can be difficult at first, so plank helps us adapt to weight-bearing on the hands without the flexibility required by poses like downward-facing dog (adho mukha svanasana), or the upper body strength required by low push-up (chaturanga dandasana), inversions or arm balances.”
“There’s no doubt plank pose is difficult, but I love the feeling that every part of my body has to work in order to hold the position. Staying in plank pose, even when it is difficult, creates a sense of personal power that is a major part of what draws me to my yoga mat. As well as helping us adjust to weight-bearing on our hands, plank pose helps us stoke the internal fire or motivation that the ancient yogis called “tapas”: hold a plank for just a few breaths and you’ll soon feel the heat build in your chest, arms, core, and legs.”
“Even experienced students find plank pose difficult, so modifications can be helpful for all of us. If you’re building up to feeling strong in plank pose, lowering your knees to the mat will reduce the effort required to hold the pose with good alignment. On days where your wrists are bothered by weight-bearing, you can prop the heels of your palms on a folded blanket or mat, or take plank pose on elbows and forearms instead. Finally, try squeezing a block between your thighs to help you recruit leg strength.”
9. Child’s Pose (Balasana)

One of the most important poses for anyone new to yoga to learn is Child’s Pose, explains Heather Dressler, owner of BodyLift Fitness. “This pose is accessible for most, and it’s a position those practicing yoga can always go to when they are feeling overwhelmed, stressed, or when they have the need to calm their body down. It’s also a good pose to move your body into when you are faced with a pose during your yoga class that you can’t physically or mentally practice at that time. When we get stressed out, often, our response is to bring our hands to our foreheads. Bringing your forehead to the mat in Child’s Pose automatically calms the parasympathetic nervous system, relieving stress, anxiety, and fatigue. If your forehead doesn’t reach the mat during Child’s Pose, you can grab a block and place it between the forehead and the mat to assist. You can also place a block behind the knees to lessen the bend and lift yourself off of your heels. Child’s Pose has extra benefits, including massaging the internal organs and opening the lower back, hips, shins, and quads. If you walk your hands forward, you can also add opening to the armpit area and the chest to the list.”
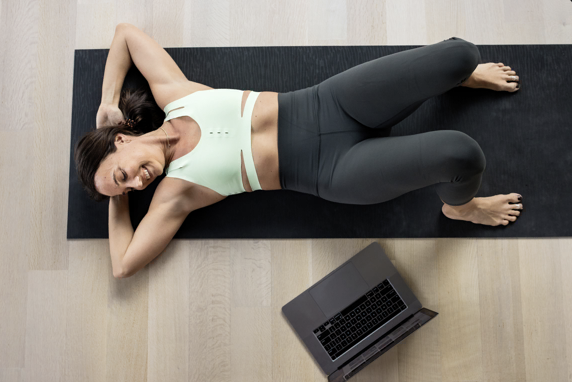
10. Corpse Pose (Shavasana)

Stress reduction is one of the top reasons people begin practicing yoga, and Corpse pose is the best yoga pose to teach one how to relax. While the name sounds a bit morbid, the goal of this asana is to let go of everything that you possibly can. While it might look like naptime, it is crucial not to fall asleep in this pose. Learning to relax in Shavasana will allow you to more easily and quickly relax into the other yoga poses, which will allow you to further reduce stress and tension in your body.
Registered Yoga Teacher Lucile Hernandez Rodriguez believes that “Shavasana is a perfect way of introducing meditation in a beginners’ class. Meditation can sometimes seem not accessible enough to beginners, especially if they are not used to seating for long periods of time and can feel discomfort when doing so. Laying down solves this issue as it allows for a total release of the body.”
“For some people lying down flat on your back might hurt. You can try modifying this pose by putting a bolster under your knees. If you have back issues, put your feet as wide as the mat, knees together for a constructive resting feeling. This pose should be all about relaxation, and you shouldn’t feel any tension in your body. When you are in the pose, bring a light focus to your breath. If you notice that your thoughts are running wild, don’t judge them and just come back to your breath.”
11. Warrior 1 (Virabhadrasana I)

There are several asanas that embody the strength and power and fearlessness, and Warrior 1 is the foundation for these empowering standing poses. “This is an energizing pose that strengthens the legs, ankles, arms, and back while stretching the hips and torso,” notes Mackenzie Shier. “It’s also great for improving balance and stability. If the full variation of the posture isn’t appropriate or accessible for your body, you can always lift the back heel to reduce pressure on the ankle and hips or even lower to the back knee. There are a wide variety of options to reduce tension in the chest, shoulders, and neck. If this is an issue, try separating the hands or even bending the elbows into cactus arms while continuing to lift the torso.”
If you need to make this pose a bit easier, have less bend in the knee. You can take a break by straightening the leg and then bending it back into position. Make sure the bent knee is pointing directly at the middle toe, to make sure you do not put excess strain on the knee joint.
12. Warrior 2 (Virabhadrasana II)
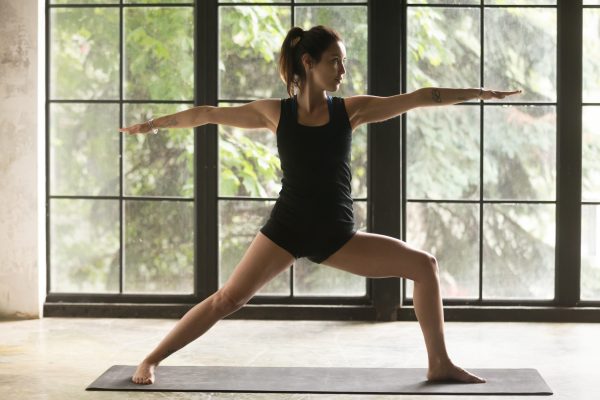
Of all of the leg lunging poses, Warrior 2 is one of the most essential for beginners to learn. Reverse Warrior and Warrior Angle both rely on the same alignment in the legs and hips as this pose. “The standing poses are a major part of yoga asana practice,” explains Rachel Land. “They create a platform through which to embody the dynamic balance between strength and softness. Warrior 2 is a relatively accessible way for beginners to explore these opposing forces—pairing a sturdy standing base with an open and expansive chest. Warrior 2 teaches us to build strength, stability, and endurance, especially in the lower body, without closing off the hips or chest; this can have flow-on benefits to our posture, and connect us to our feet in a way that boosts our stability in all standing positions.”
“Like all Warrior poses, the posture creates a feeling of strength, power, and focus. The open, side-facing nature of Warrior 2 reminds us to balance that strength with softness by relaxing the face, releasing the sides of the neck, and allowing our collarbones to broaden. Though a foundational pose, Warrior 2 still requires significant strength and range of motion. Try moving your feet closer together to reduce the load on your legs. You might also find that turning your back foot and hip slightly toward the front of your mat (rather than toward the side of your mat) makes it a little easier to keep your front knee tracking over your front ankle. If your shoulders fatigue, bring your hands to your hips or into prayer position (anjali mudra).”
13. Tree Pose (Vriksasana)

Of the many balancing poses in yoga, Tree pose is the most common and best suited for the beginner. Registered Yoga Instructor Annette Goubeaux describes Tree pose as a “simple, foundational pose that is physically challenging for the hips, balance, ankles, and feet. It will make you feel strong and grounded even if held for a few breaths. As a strengthening posture, it helps you for all other balances in yoga and is a wonderful transition posture to move smoothly from pose to pose with strength and focus.”
“The practice of this posture can change daily based emotional factors such as how much sleep you’ve had, type of day, interactions with others, so it is important to tune into your emotional body and simply notice, and never judge. Emotionally it can help curb anxiety and stress and is a great way to slow down when you are feeling overwhelmed. From a mental standpoint, it can help create more confidence and raise your self-esteem as you stand tall and proud, which is why this is one of my favorite beginning yoga postures. Although it can start off challenging, students often find they can mark progress easily as they master this posture and grow stronger.”
“Tree pose builds strength in the core for more advanced yoga postures later, and as a strengthening posture, it helps you for all other balances in yoga and is a wonderful transition posture to move smoothly from pose to pose with strength and focus. This asana also helps to open the hips which will help to counteract tight hips that we often get from spending time sitting at a desk, while watching TV or while driving a car. It is also a great standing posture for beginners to work on to learn to connect to their breath, gain focus and clarity and keep the body balanced on one foot. This posture also teaches the student to connect with themselves as it is difficult to let your mind wander while in a balancing posture. To make this asana easier for a beginner, you can try varying foot positions such as heel to your inner calf, a block, or inner thigh.”
14. Bridge Pose (Setu Bandha Sarvangasana)

One of the most common asanas to practice at the end of a yoga practice is Bridge pose. Tom Johnson likes Bridge pose for its accessibility and versatility. He tells us that “it can be either a calming posture or an energizing one, depending on how the pose is executed. It’s also a great preparatory pose for the more complex Wheel (Urdhva Dhanurasana ) and Shoulderstand (Salamba Sarvangasana) postures.”
“Bridge Pose is a nice, grounding pose that creates flexibility in the thoracic spine, strengthens the back, legs, and glutes and opens the hips and shoulders. It’s an excellent counter-pose to the position many people assume during the day as they’re hunched over a computer or steering wheel. Bridge Pose is often performed after a vigorous flow sequence, so it helps to slow down the heart rate, calm the mind and ease anxiety. It’s a posture that opens up the shoulders and heart center, allowing students to feel more compassion for the self and others.”
“A beginner may want to enter into this posture using blocks as support. Initially, the beginner can use them by placing one block underneath the back at the base of the shoulder blades, which helps to open the heart center. The second block is placed under the head at the second-highest level to support the head. The beginner can keep the legs bent or straighten the legs and let the full weight of the body be supported by the blocks.”
15. Four-Limbed Staff Pose (Chaturanga Dandasana)
If you go to a popular vinyasa or flow yoga class, you will need to know how to properly move into a Four-Limbed Staff pose. Chaturanga is a part of the Ashtanga yoga Sun Salutation but can be substituted with knees-chin-chest posture if it is too challenging. This yogi pushup movement is one of the most difficult to have the correct alignment of all of the basic yoga poses, especially for new students.
Kelly Clifton Turner believes that “the most common misalignment in the classic yoga push up transition, often known as Chaturanga is rushing through and letting gravity do all the work. Instead of flopping down low, s-l-o-w it down. Move with control. Keep your upper arms hugging in towards the ribs as you hinge the elbow joints back towards your hips. Stop when the shoulders are either at or over the elbow line, avoiding the “stripper dip,” which can wreak havoc on your rotator cuffs. Knees can always be on the ground to support this mindful transition without sacrificing form.”
16. Wide-Legged Standing Forward Bend (Prasarita Padottanasana)

Many people are afraid to go to a yoga class because they think they are too inflexible, especially in the hamstrings, to do the practice. The Wide-Legged Standing Forward Bend pose is a perfect hamstring stretch for these beginners as it allows a gentle stretch in the backs of the legs to promote flexibility. Mar Soraparu, Partner at BIAN, believes that “the wide-legged standing forward bend is one of the most effective and approachable poses, in my opinion for any yoga practitioner to put to practice. This pose can be modified or advanced quite simply with simple shifts and opens the entire body with the added benefit of a slight inversion.”
“As you embark on your yoga journey there is naturally some anxiety around starting a new practice which is why the added benefit of having your head below your heart in this pose, allowing for extra blood flow to the brain, supports easing into your practice with a sense of serenity and confidence when you are just getting started. For a beginner specifically, this pose serves as an introductory point to opening some of the major muscle groups all at once in a safe and effective way. For those who feel that they do not have any flexibility, rest assured that with the use of blocks, bending of the knees, and adjusting the positioning of the feet to a wider stance, you are able to experience the benefits of this pose.”
“The lower back, hips, hamstrings, groin, and calves are the primary muscles being stretched; however as you ease into the pose, you may feel a release in the neck and entire spine as gravity gently pulls you downward and slightly forward. Additionally, the ankles, knees, and quadriceps are strengthened as you engage these areas to stabilize. The light inversion element is incredibly beneficial to calm the nervous system which can relieve anxiety, stress, fatigue, and many other unpleasant emotional states as fresh-blood flow circulates through the body and into the brain.”
“This pose not only is excellent for your physical being but is incredibly effective in the interconnectedness of the mind and body. I always feel the narrative of my mind slow to a steadier pace as soon as I begin this pose. The longer I hold, the more my body releases and my mind finds clarity.”
17. Bound Angle Pose (Baddha Konasana)

One of the most accessible poses to increase flexibility in the hips is Bound Angle pose. Kelly Clifton Turner believes “this pose is great for beginners, as it is a pose that can easily be modified to fit the individual. This pose has many benefits – a few include stretching the inner thighs and knees, as well as enhancing overall circulation in the body.” If the pose is too deep of a stretch, you can modify by sitting up on a cushion or blankets, sliding the feet further forward, or by placing yoga blocks under the knees.
Turner also suggests that beginners practice this pose in the reclined variation. “Angle and support the torso up on a couple of blocks or (better yet!) a bolster. Draw the soles of the feet together and allow the knees to drape wide. If there is any strain on the inner groin, slide blocks, blankets or bolsters under the knees to give the body permission to truly relax. Rest one hand on the belly, connecting with the rise and fall of breath, and the other hand at the heart, feeling the steady drumming of the amazing organ that supports you every second of every day. Stay for five to ten minutes (or longer!) and connect with a sense of gratitude and love towards yourself.”
18. Fish Pose (Matsyasana)

If you have poor posture and tend to hunch forward then you will love how Fish pose opens up your chest and helps to realign your spine. This back-bending pose is an excellent gentle, and soothing stretch for beginners. Lucile Hernandez Rodriguez tells us that “this pose will greatly help you in beginning your yoga practice as it will bring you the shoulder mobility you need for other poses such as downward-facing dog.”
“Most beginners have tight shoulders from being hunched at a computer all day. If that’s your case, fish pose will bring a feeling of release and gently open your body. You will find a backbend in your thoracic spine and stretch the whole front of the body, including your throat, chest, and abs. I personally love this pose as it allows me to totally let go of tensions after working on my computer. I also love the soothing and energizing feeling that comes with slowly opening your chest while breathing deeply.”
“To make this pose easy, try rolling a blanket, placing it under your shoulder blades and laying down on it. If this is too much for you, unroll the blanket a bit until it is fully comfortable! Make sure there is no tension in your shoulders or neck and that you feel at ease breathing in this position.”
Practice Tips for Yoga Beginners
Even though this list of poses for beginners is small, it is still a lot of information to digest at once. It is highly recommend that you begin to explore these poses slowly and carefully to not be overwhelmed. The How to Start a Yoga Practice guide will give you the four basic steps to starting a yoga practice. The General Practice Guidelines covers all of the dos and don’ts to starting a successful yoga practice. Once you have looked through these two articles, continue reading the Yoga for Beginner’s section for further tips and advice.