
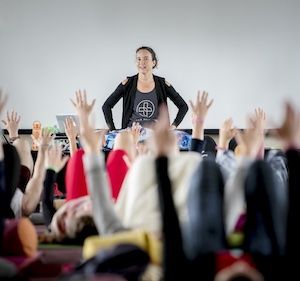


Anatomy, Articles, Hip, In the Press, Myofascial Release, Rachel Land, Resources, Shoulder, Spine, Yoga Medicine® News
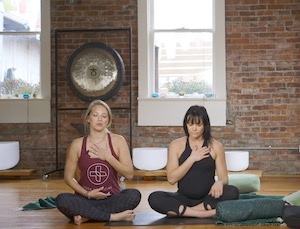
Self Myofascial Release Practices for Better Backbends
Senior Yoga Medicine® teacher Rachel Land shares a simple sequence that can unlock common areas of resistance and make your backbends feel better.
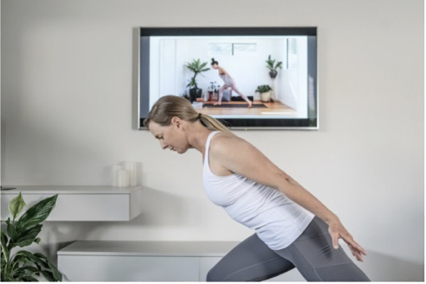
Backbends have undeniable benefits. In a world where most of us sit in cars or at computers for hours each day, poses that create spine and hip extension help to balance out the biomechanical patterns created by sitting.
However, the benefits of backbends are not always accessible. We all differ in our bone structure, our proportions, and the consistency of our soft tissue. Because our range of motion in any given pose is unique, the deep backbends enjoyable to some of us are not achievable for all. In fact, chronic tightness in the front body (the very tension backbends seek to alleviate) can prevent us from being able to comfortably find our range in backbends; instead of creating the desired feeling of space, backbends may do the opposite—cause compression or claustrophobia, and take our breath away.
That’s where self myofascial release (SMFR) can come in handy. It is one of my favorite tools for unlocking habitual areas of tension, and it’s perfect for people who struggle to find freedom in backbends.
A Sequence to Make Backbends Feel Better
The key areas for focus in this SMFR sequence are:
The hip flexors
Rectus femoris, tensor fascia latae (TFL), iliacus, and psoas. When chronically short and tight, these muscles draw the pelvis into anterior tilt, in which the front of the pelvis tips forward and thus deepens the curve in the lumbar spine. When we backbend in anterior pelvic tilt we come to the end of our range in the lumbar spine more quickly. Instead of giving the hip flexors a much-needed stretch, we can end up feeling pressure or compression in the low back—especially when gravity deepens the backbend, as it does in upward facing dog (urdhva mukha svanasana) and camel pose (ustrasana). Releasing our hip flexors to reduce anterior pelvic tilt may allow us to explore our range of motion without crowding the low back.
The rectus abdominis
This familiar abdominal muscle draws the base of the sternum toward the front of the pelvis. While subtle engagement can provide helpful support in backbending poses, excessive tension there can leave us feeling constricted and unable to find free range of motion or easy breathing. A tight rectus abdominis isn’t an issue for everyone, but it can be for athletes and those who unconsciously brace the belly or hold it in.
Muscles that limit arm and shoulder movement
The pectoralis major and latissimus dorsi in particular. The pectoralis major is our main chest muscle, while the latissimus connects the inner upper arm with the low back. Sitting doesn’t just influence the hips and spine; the arm and chest muscles also tend to get short and tight when we chronically slump forward with our arms in front of our body. This can be a limiting factor in backbends, most of which involve the arms as well as the hips and spine.
Backbends that require the arms to move behind the body into extension, such as bow pose (dhanurasana), require the pecs to lengthen. The deepest backbends—including wheel, or upward bow pose (urdhva dhanurasana), and the overhead bind in dancer pose(natarajasana)—take the arms into overhead flexion, which requires elasticity in both pecs and lats. So relaxing chronic tension in these muscles can make backbends feel significantly freer, increasing the mobility of the arms and reducing the required range from the spine.
The upper portion of the gluteus maximus.
The lower portion of gluteus maximus is a hip extensor, which makes it a huge help in backbends, but the upper portion assists hip external rotation. When our glutes fire strongly both movements tend to occur (which is why the knees tend to flare wide in backbends). Hip external rotation in backbends is not problematic for some, but in others it can crowd or compress the sacrum (the triangular bone at the base of the spine that joins the two halves of the pelvis). Releasing the upper portion of gluteus maximus might just help us find more hip extension without feeling the glutes grip or clench around the sacrum.
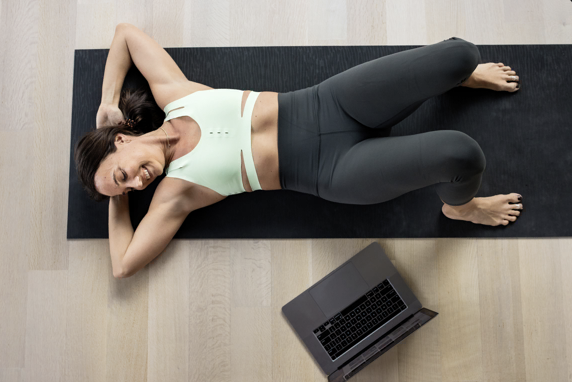
This SMFR sequence will help you unlock some of these common areas of resistance, creating space for you to feel freer and easier in your unique range of motion. You will need two same-size massage or tennis balls (shown below are the Recovery Rounds by RAD and Yoga Medicine® and a yoga block.
Before you try the sequence, practice a backbend you usually experience as limited. That will give you a baseline for comparison after myofascial release.
Note: Self myofascial release on the abdomen is not recommended during pregnancy. If you are pregnant, either skip these locations (iliacus, psoas, and rectus abdominis) entirely or seek advice from your healthcare provider.
Rectus Femoris
The sequence begins with the hip flexors. To work on the right rectus femoris, set up on all fours with a massage ball on the floor in front of your right kneecap. Slide your left knee forward and toward the left side of your mat, and then lean onto your forearms so that your right lower thigh sits on top of the massage ball. Tuck your right toes under and use that leverage to move your leg forward and backward, rolling up and down the bottom third of your right thigh until you find an area that feels tense or tender. Then either rock side to side across the muscle fibers or bend and straighten your right knee to pin the superficial fascia in place while the deeper layers glide with that movement.

Spend 10 to 15 seconds on whichever option feels the most helpful, and then rest on that spot for 5 to 10 seconds, encouraging your right thigh to soften as much as possible. Now inch your body down your mat until the massage ball is roughly halfway between your right kneecap and hip crease. Roll up and down the middle of your thigh until you find a tender area to work with, and then rock from side to side or bend and straighten your knee for up to 30 seconds before moving on to the right TFL.
Tensor Fascia Latae
To investigate the right TFL, remain in the same position but place the massage ball roughly an inch below and an inch to the right of your right frontal hip bone (so that it is between the front and side of your pelvis). Remain still or rock gently side to side for 15 to 20 seconds.

Then remove the massage ball and lie down on your belly with your left knee still bent out to the side.
Iliacus

For the right iliacus, place your massage ball just inside your right frontal hip point or ASIS so that the edge of the ball is almost touching the inner surface of that bony ridge.

Make your head and neck comfortable (perhaps by resting your head on stacked hands or turning it to one side). Take a few slow breaths, deliberately relaxing your lower belly with each exhalation and allowing the massage ball to melt in.
 Once you feel your abdomen relax, either remain as you are for 10 to 15 seconds or bend your right knee to 90 degrees and rock your lower leg from side to side like a windshield wiper.
For the final 5 to 10 seconds, release your right leg back to the mat and feel the massage ball sinking in toward the inner rim of your pelvis.
To move on, remove the ball and slide your left leg down beside your right leg. Take a few breaths lying prone, and see if you can feel a difference between your right and left sides. Then press back up to hands and knees to repeat the sequence on your left side.
Psoas
After you have worked on the left rectus femoris, TFL, and iliacus, move on to our primary hip flexor—the psoas. Lie on your belly with your two massage balls an inch apart just below your navel.

Make your head and neck comfortable and allow your belly to expand and push the balls out as you inhale; then soften to allow the balls to sink in as you exhale.

Either stay as you are or tuck your toes and lift your knees to lean more weight onto the massage balls. Breathe here for another 15 to 20 seconds, and then remove the balls and take a few relaxing breaths.
Rectus Abdominis

Next, work on the rectus abdominis, the primary trunk flexor. Remain prone with your head and neck in a comfortable position.
Move the massage balls higher until they are side by side, pressing into the soft tissue below the base of your sternum in between your ribs (not into the bones themselves). Use the rhythm of your breath to encourage your muscles to relax so that the massage balls melt into your upper abdomen.

Either stay prone or prop yourself up on your forearms, using your body weight to pin the muscles in place as you lengthen them. Stay another 15 to 20 seconds in your chosen position, and then remove the balls and breathe deeply for a moment or two. Take the opportunity to notice how you feel so far.
Pectoralis Major
Now shift focus to the chest and shoulders, starting with the pectoralis major, the large (and often tight) superficial chest muscle. From your prone position place your block on its lowest height under your right shoulder and place one massage ball on top of it. Then adjust your props so that the massage ball nestles into the hollow below your outer right collarbone (just inside the head of your shoulder).

Put your right arm in a cactus position and relax as much as you can so that the weight of your arm and shoulder creates pressure on the massage ball. Relax your head and neck, resting your forehead or temple on the back of your left hand or the floor.

Stay for 20 to 30 seconds, breathing slowly and fully into your chest. If you’d like more sensation, reach your right arm forward and back, using your body weight to pin the muscle in place as you lengthen it. When done, remove your props and take a couple of breaths with your arms down by your sides to see if the right and left shoulders feel any different. Then repeat the process on the left side of your chest.
Latissimus Dorsi
When you are ready to move on to the latissimus dorsi, press up to all fours, and then sit upright. Take your left thumb to your right armpit, and catch the thick strap of muscle at the back of your armpit between your left thumb and fingers. That is the target area: the top of the right latissimus dorsi as the muscle fibers gather to insert onto the inner right upper arm.

Lie down on your back with knees bent and feet on the floor, supporting your head on your block. Use your left hand to hold one massage ball against the target area on the upper right latissimus as you take your right arm out wide. Once the weight of your body pins the ball in place, you can release your left hand and start to roll toward your right, using your body weight to create the desired intensity of sensation: The more you roll toward your right, the more intense the sensation.

If you feel enough sensation, remain still for 20 to 30 seconds, breathing freely. If you want more sensation, slide your right arm along the floor toward the top of your mat—using body weight to pin the latissimus in place as you lengthen the muscle—and then slide it back toward the side of your mat. Repeat the arm movement two or three more times before resting still for a final breath.
When you are finished, remove the ball and roll onto your back. Stretch both arms overhead to see if you feel a contrast between the right and left sides before repeating the process for your left latissimus.
Gluteus Maximus
Finish the sequence by releasing the upper fibers of the gluteus maximus. Lie on your back, bend your knees, and place your feet on the floor. Lift your hips high enough to pin both massage balls beneath you on either side of the pelvis about an inch below the top rim and an inch wide of the sacroiliac joints.

Slowly rock your knees from side to side, feeling the weight shift from one massage ball to the other. If that feels helpful, stay with that gentle movement for 15 to 20 seconds.

If you’d like more sensation, prop yourself up on your forearms to roll your body an inch or two toward the top of your mat and back again, gliding the massage balls up and down either side of the upper half of your sacrum to release any tension there.

For the final 5 to 10 seconds find a position in which you can remain still and soften the skin over your buttocks. Then remove the massage balls and take a breath or two lying flat on your back. See if you can feel a sense of softness or spaciousness around your sacrum.
Now that the sequence is complete, repeat your chosen backbend, paying particular attention to the areas you have worked on. Aim to lengthen the front of the thighs, hips, and torso, and open the chest and side ribs, while softening the tight grip the glutes might have on the sacrum. Notice how it feels to breathe in this position before moving out of the pose.
Remember that the benefits of backbends stem not from the depth we achieve, but from their capacity to balance life’s tendency to compress the front of the body. Range of motion differs for each of us, but releasing the areas that stop us from finding our mobility can turn feared or dreaded backbends into poses we can all enjoy.
Video/Photo credit: Kyle Rebar